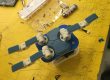
Tevo Tarantula (kit)
I was tired of running to the HackRSpace and Makerspace all the time and knowing that I had to do a lot more 3D printing for my Master’s Thesis, I finally pulled the trigger and ordered the very well-reviewed Tevo Tarantula 3D printer kit for about $200.
Most of the 3D printers use essentially the same parts so a kit printer can be a good value. It however does take considerable amount of time to put together and can be frustrating for novices. Putting these kits together CORRECTLY can make all the difference.
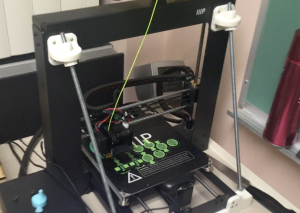
After I completed that build the printer worked well, as you can see in the video of the first print I made below (the benchy boat of course).
Maintenance and Upgrades
- Acrylic brackets: The printer however used cheap acrylic lasercut pieces all of which eventually cracked and failed. Over the course of several months I spent time replacing all of these parts with similar or improved lasercut plywood or 3D printed plastic pieces
- Print bed carriage: This was also lasercut and would flex and vibrate at high speeds. I replaced that with a thick aluminum plate that I ordered on Amazon
- Hot End: The hot end that came with the printer was ok, but I later upgraded to an all-metal, tried and true E3D V6 hot end
- Dual Screws: The printer came with a single lead screw for the Z-axis. I upgraded it to dual (still only using 1 motor)
- Frame Stiffening: I added a large amount cast aluminum brackets, bolted the printer down to a flat piece of heavy plywood and added a threaded rod across the top gantry for additional stiffness.
I am sure I am forgetting a bunch of upgrades but as you can see it took a lot of work to reach a point where I was satisfied with the printer’s build quality. Ever since it has been a great workhorse, with hundreds of hours on the clock and still going strong.


Monoprice Maker Select v2.1
At some point I decided that 1 printer was not enough. I had always wanted to get a Monoprice Maker Select due to its large following and great reviews. I had been watching a few “broken” MMS printers on eBay and finally pulled the trigger. For $100 shipped I got a fully functional printer with just a broken limit switch on the x-axis!
Maintenance and Upgrades
- Frame Stiffening: The printer was of decent build quality, however like any other low-end printer suffered from frame stiffness issues, which are well-know and there are many frame-stiffening kits designed and available on Thingiverse. The first thing I did was to add these
- Spool Holder: My printer was missing the handle/spool holder, so I designed and put together a lasercut plywood spool holder
- Part Cooling Fan: The original fan was subpar, so I replaced it with a 50mm Turbo style fan
- Print Bed Carriage and Bearings: I noticed that it was almost impossible to level the bed. I disassembled it and it turned out that the mounting plate was defective and refused to be straightened. I replace that sheet metal piece with a solid milled aluminum plate and added Igus bearings while I was at it.
Ever since those few upgrades the printer has been working flawlessly and just like the Tevo Tarantula, has been used for hundreds of hours. Since it still has the original hot-end, I have been using it as my dedicated PLA printer.